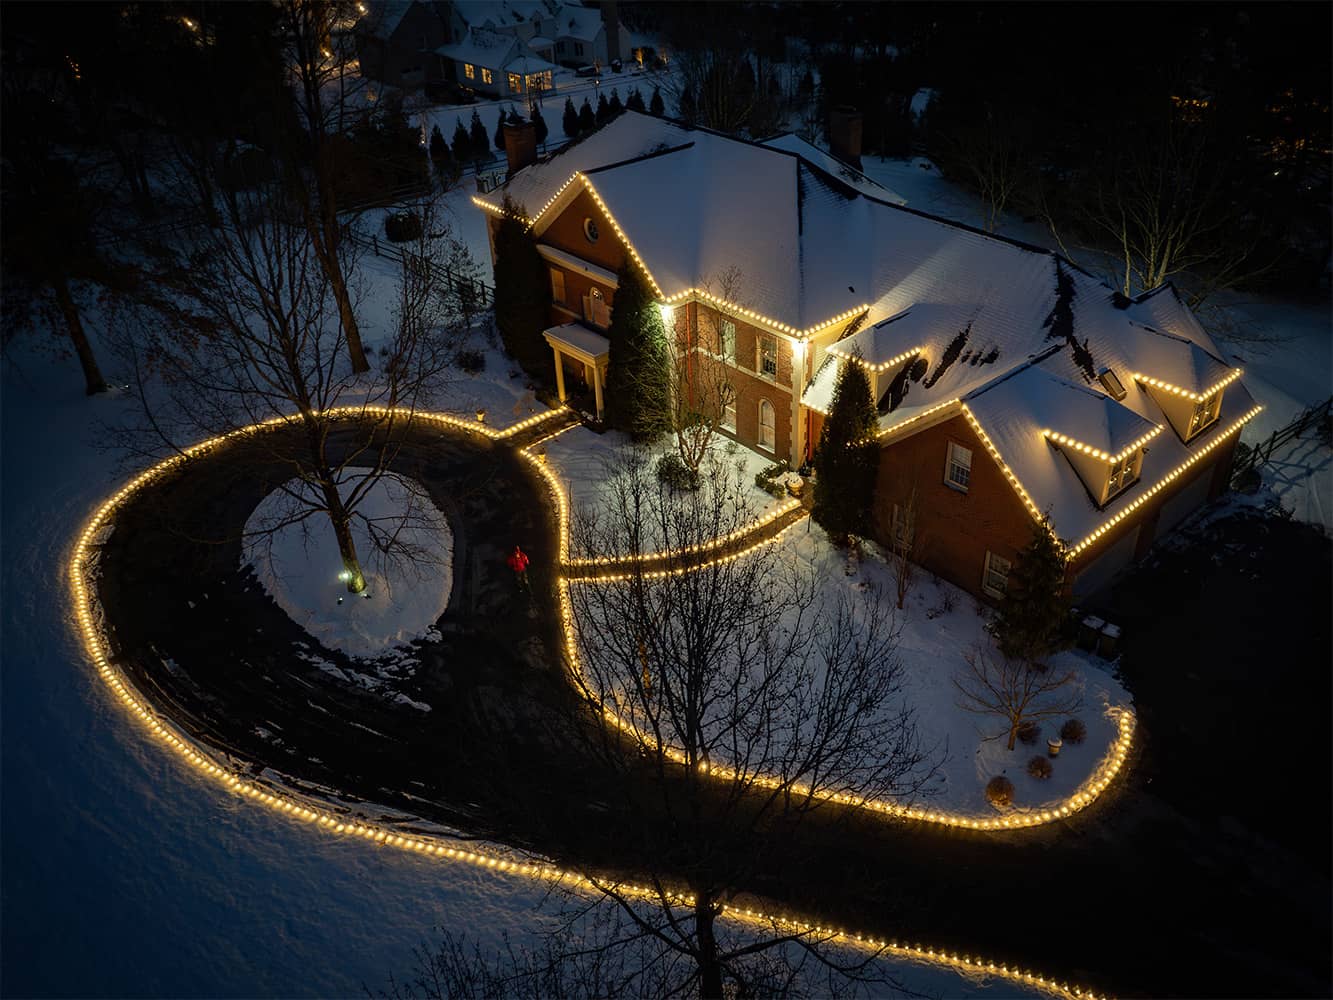
What happens when the holidays are over? The decorations that once made your home glow with warmth and cheer now look a little out of place. And while it might be tempting to leave them up until spring (or longer), timely and careful light removal is just as important as a perfect installation. Let’s walk you through how to make post-holiday light removal easier, safer, and more efficient, whether you’re handling it yourself or considering professional removal services. Our guide is built around real-world knowledge of Pittsburgh winters, home safety, and best practices for holiday light care in 2025.
It’s easy to focus on installation and overlook removal. But how and when you take down your holiday lights can affect:
● The longevity of your lights
● The condition of your roof, gutters, or siding
● Safety for yourself and your property
● How easy it is to decorate next year
Letting lights sit too long after the holidays means exposing them to ice storms, fluctuating temperatures, heavy snow, and freeze-thaw cycles, all common in January and February in the North Hills of Pittsburgh. These conditions cause clips to crack, wires to stiffen and break, and bulbs to fail prematurely.
A little planning now saves a lot of frustration later.
There’s no universal rule, but here are the general guidelines we recommend for homes in the North Hills:
● Ideal removal window: January 2 – January 15
● Avoiding bad weather: Choose a day above 30°F with no wind or precipitation
● Before snow accumulation: Don't wait for February snowstorms to bury your cords or make roof access dangerous
Waiting too long can trap light clips under ice, create frozen wires, and increase the risk of accidental damage to your home or your lighting equipment.
Whether you're planning a DIY takedown or supervising a crew, having the right tools makes the job smoother and safer.
Here’s what you'll need:
● Sturdy ladder with rubber feet and an assistant for safety
● Protective gloves (to prevent cuts from wire edges or ice)
● Weather-resistant storage bins or reels
● Labeling tape and permanent marker
● Plastic hooks or clips (for easy removal without damaging trim)
● Soft brush (to remove snow or ice buildup around bulbs)
Avoid pulling or yanking lights free, especially if clips or wires are frozen. This can cause serious damage to both your lighting system and your roof or siding.
Here’s how to remove your lights the right way, without damaging your home, your lights, or your fingers.
Pittsburgh winters are unpredictable. Choose a dry, calm day above freezing if possible. Ice on your roof or in your gutters is not just inconvenient, it’s dangerous.
Pro Tip: Start mid-morning after any frost has melted but before evening temperatures start to drop.
Unplug every strand from power sources before touching any bulbs or wires. If you’re using smart timers or Wi-Fi-enabled controllers, deactivate the system and disconnect the equipment indoors first.
This step also gives you the chance to:
● Inspect cords for burnout or damage
● Remove batteries from timers or smart plugs
● Label components if needed
Start at the highest point of your display and work downward. This keeps you from accidentally yanking lights that are still secured above and prevents tangling.
Best practice: Have someone at the base of your ladder assist by gathering the removed strands and placing them in designated containers.
Never yank or twist lights off your home’s exterior, especially if temperatures are below freezing. This is where most damage happens.
● Plastic clips can become brittle in the cold and snap
● Wires can stiffen and split
● Stapled lights (which we don’t recommend using) can tear into your shingles or siding
If you find that clips are frozen to your gutters or trim, use warm water in a spray bottle to gently loosen them, or wait for a warmer day to continue.
Once removed, take the time to wind each strand individually and store it in a plastic reel or large zip-top bag.
Key tips:
● Label each strand by location (e.g., “Roofline - Front”, “Left Gable”)
● Store indoors in a climate-controlled area to prevent corrosion
● Don’t mix lighting types (e.g., RGB smart lighting and traditional LED strings) in the same bin
This small investment in organization will pay off big-time next November, making installation much faster and reducing the chance of early failure.
Use your takedown time to quickly inspect your lights for:
● Cracked bulbs or sockets
● Frayed or pinched wires
● Broken or missing clips
● Water intrusion signs near connectors
Don’t pack away damaged items. Either repair them now or discard them.
After your lights are down, don’t forget to check your:
● Gutters (clear out any leftover clips or debris)
● Roof edges and shingles (check for any lifted areas or visible damage)
● Exterior outlets (ensure they’re sealed and not exposed to moisture)
These small checks can help identify any winter-related wear or tear and prevent costly surprises in spring.
Taking down your holiday lights doesn’t have to be frustrating, rushed, or risky. With the right strategy, or a trusted professional, it becomes just another part of enjoying a stress-free season.
Preserve your lights, protect your home, and set yourself up for success next year by making smart decisions now. Whether you remove them yourself or partner with a pro, your home, and your future self, will thank you.
Let us help you wrap up the season, the right way.
Contact us today to schedule your post-holiday light removal and experience the difference of working with North Hills’ most trusted lighting professionals.
At MAT Lighting, our blog is designed to help homeowners understand what goes into a professionally installed holiday lighting display. While these articles provide inspiration and guidance, every home is different — and professional design, installation, and maintenance make all the difference.
To learn more about our full process, what’s included, and when to book, explore our complete holiday lighting services.